Attack on titan(shingeki no kyojin)
How to make "3d maneuver gear"(Rittai kidou souti) (with templates)
Comic version
Vol.1 blade part
Watch tutorial video at first
Materials
[Materials for making templates]
-Drawing paper 10sheets
-"Kousakuyousi"(one of hard paper in Japan) 10sheets
-Scotch tape(Sellotape) 3pieces
-Packaging tape(parcel tape) 1piece
Additional explanation
-After printing, it becomes easy to use by sticking it on Drawing paper with spray glue.
-Size:Free size
-Mentions of "x1","x2" etc are the numbers of sheets.
(If you need both arms or both legs etc, cut the number of double.)
-Mentions of "2mm" , "5mm" etc are thickness of EVA foam.
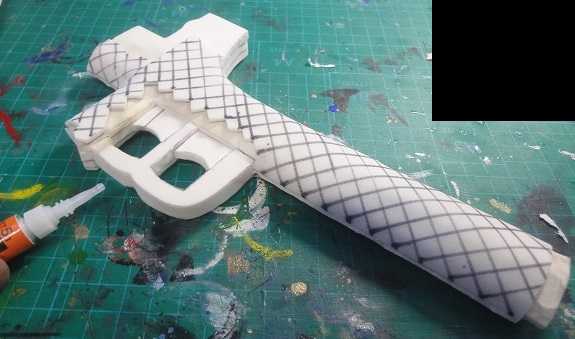
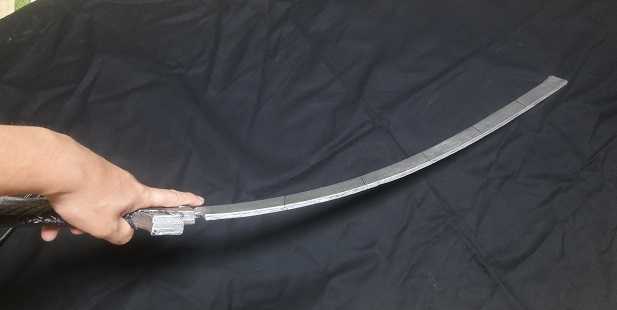
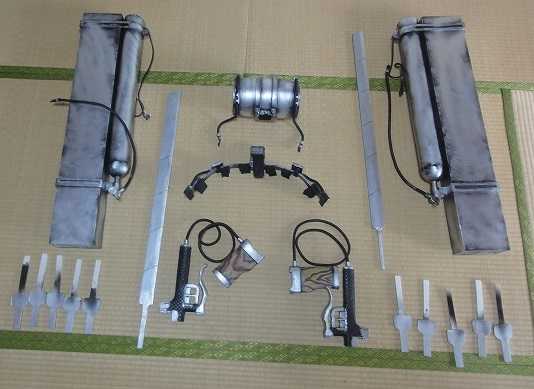
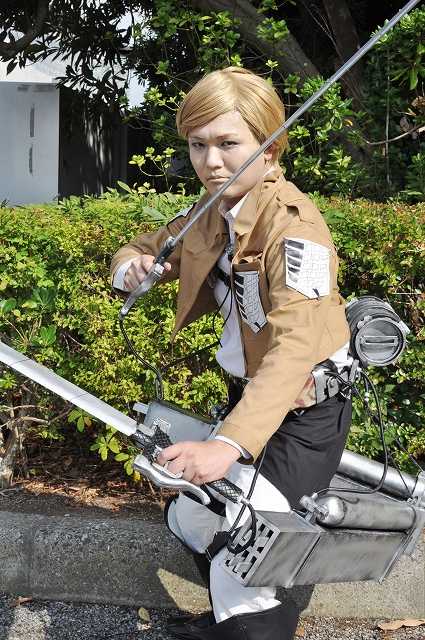
Blade Completion image Caution Bellow photo is a image photo aftet completing. Caution Don't print bellow photo. Caution Read "How to print".
Sheath Completion image Caution Bellow photo is a image photo aftet completing. Caution Don't print bellow photo. Caution Read "How to print".
Tank Completion image Caution Bellow photo is a image photo aftet completing. Caution Don't print bellow photo. Caution Read "How to print".
Anchor and frame Completion image Caution Bellow photo is a image photo aftet completing. Caution Don't print bellow photo. Caution Read "How to print".
Belts Completion image Caution Bellow photo is a image photo aftet completing. Caution Don't print bellow photo. Caution Read "How to print".
Attention in the work
-When you uses a thing including the thinner(Bond, lacquer thinner etc) or spray, make good ventilation.
And wear a gas mask.
-When you toast mterials etc, make good ventilation.
And don't breathe smoke, don't put smoke in your eyes.
-When you dig mterials etc with Soldering iron, make good ventilation.
And don't breathe in smoke, don't put smoke in your eyes.
-Don't use fire near the things which are easy to burn such as paint, thinner
etc.
-When you finished using tools, pull an outlet.
-Read labels of materials and tools, and understand how to use.
Please support me
If my tutorials supported you, please support me.
-Support method 1
Please join my YouTube channel's membership.
Just $0.99 per month.
These are membership benefits.
-Early access of new videos
-Prioritize replying to comments
-Videos for only members
etc
-Support method 2
Please suppor me by YouTube's SUPER THNAKS.
It's the supporting function for Youtube videos.
It look like SUPER CHAT.
Click this banner.
"Kousakuyousi"(one of hard paper in Japan) is sold in only Japan.
It's harder than Drawing paper. The thickness is about 0.5mm.
I'm sure you can't get it.
Then, substitute various thin plastic sheets.
Make the edges smooth with a Soldering iron (Don't breathe in the smoke, be careful a burn).
Or, cut it by edged tools.
(Actually I used fire, but it's dangerous method. I recommend a Soldering iron
If accedents happens, it's self-responsibility)
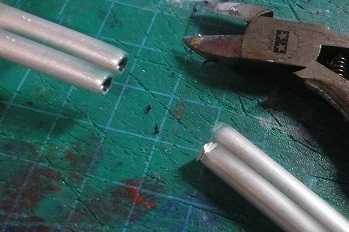
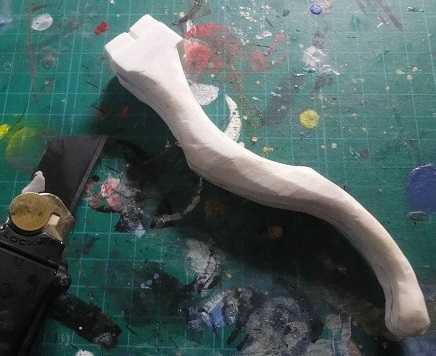
Cut material into the Templates form.
Cut out 1.5mm or 2mm thick EVA foam.
Carve the pattern with a Soldering iron. (Don't breathe in the smoke and don't put in eyes. If accedents happens, it's self-responsibility.)
ギャクヨガが使っているハンダゴテです、安全の為に台も買いましょう。
Make the ring form parts.
Cutting with Box cutter etc is also good, but Using Prick punch is better.
Cut 1.5mm or 2mm thick EVA foam into a circle form with a Prick punch.
Make a ring by cutting it with a small Prick punch.
Make the edges smooth with a Soldering iron (Don't breathe in the smoke, be careful a burn).
Or, cut it by edged tools.
(Actually I used fire, but it's dangerous method. I recommend a Soldering iron
If accedents happens, it's self-responsibility)
Make the edges smooth with a Soldering iron (Don't breathe in the smoke, be careful a burn).
Or, cut it by edged tools.
(Actually I used fire, but it's dangerous method. I recommend a Soldering iron
If accedents happens, it's self-responsibility)